How to set up a virtual mailbox: a step-by-step checklist
Published
Setting up a virtual mailbox involves more than choosing an address and paying for a plan. You also need to verify your identity, authorise the provider to receive mail and tell senders where to deliver it.
The process is manageable when you do those tasks in order. This guide covers personal US virtual mailboxes, whether you’re preparing for RV travel, moving abroad or simply want online access to your letters.
We may earn a commission if you sign up through links in this guide.
1. Decide what you need the address for
Start with the job you want the mailbox to do.
If you mainly need to receive letters and read them remotely, focus on mail handling, scanning allowances and cost.
If you also need an address for a driving licence, vehicle records, banking or domicile, assess those requirements separately before buying. A street-format mailing address does not automatically satisfy residential-address requirements.
Read Can you use a virtual mailbox as your permanent address? if official address use is part of your decision.
2. Choose a location and a suitable plan
A particular city or state may matter to you, but don’t pay extra for a location you don’t need solely because it sounds more convenient.
Compare:
- Incoming-letter allowances.
- Included scanning and additional scanning charges.
- The number of people receiving mail.
- Monthly versus annual payment.
- Options for receiving originals when needed.
Check whether scanning is counted by page or by request. Ten three-page letters mean 30 scanned pages.
Our mailbox cost calculator gives you an estimate based on your expected usage. Read how virtual mailbox pricing works for an explanation of the main charges.
Traveling Mailbox is our preferred service for remote mail access. You can explore its plans and available addresses.
3. Create the account and record your address
Use accurate account details and an email address you can access reliably while travelling. Secure the account with a unique password and any additional security options available.
Once assigned, save the complete mailing address exactly as the provider supplies it, including your mailbox number.
Also review how the provider handles additional recipients. An allowance for several names does not mean everyone’s verification is automatically complete.
4. Prepare the required identification
USPS Form 1583 records both photo identification and address identification. The current form specifies acceptable documents for each category. Follow the provider’s instructions and use documents that meet those requirements.
Official USPS Form 1583: identification requirements
Check this before booking a verification appointment, particularly if you are abroad or your documents show an old address.
Traveling Mailbox publishes guidance for non-US citizens and identification requirements. Read its identification guidance.
Submit identity documents through the provider’s designated verification process.
5. Complete USPS Form 1583 and verification
Form 1583 authorises a commercial mail-receiving agency to receive mail on your behalf. It is not a change-of-address request.
Follow the provider’s instructions for completing and signing it. Verification arrangements can differ; don’t assume every service follows the same appointment or notarisation process.
Traveling Mailbox describes a video-verification and electronic-signature option with its team, alongside a notarised alternative. It cannot process incoming mail until the required form is completed.
Wait for confirmation that the account is ready before relying on it for important correspondence.
6. Update senders and test delivery
Tell important senders your new mailing address. Arrange suitable transitional forwarding separately if needed.
Prioritise correspondence you still receive on paper, and keep a checklist of completed updates. Where an organisation asks for residential details as well, distinguish those from your mailing instructions.
Send a test letter using the complete address. Check that:
- The letter appears in the account.
- You receive the expected notification.
- You can request and read a scan.
- You know how to retain or request delivery of the original.
That small test helps you catch address-format or account problems before an urgent letter arrives.
7. Set your mail-handling preferences
Decide how you’ll deal with incoming correspondence.
Will you request scans individually? Do you need certain originals retained? Where should physical mail go when you ask for delivery?
Review any automatic settings carefully. Keep delivery destinations current, especially if you move frequently.
Check physical retention and disposal rules too. An online scan and the original letter are separate items; don’t assume the original remains available indefinitely.
8. Establish a checking routine
Enable notifications and review mail regularly. Save important scans, note deadlines and act promptly on letters needing a response.
After your first few months, compare actual usage with your plan. You may need fewer scans than expected, or a larger allowance may suit you better.
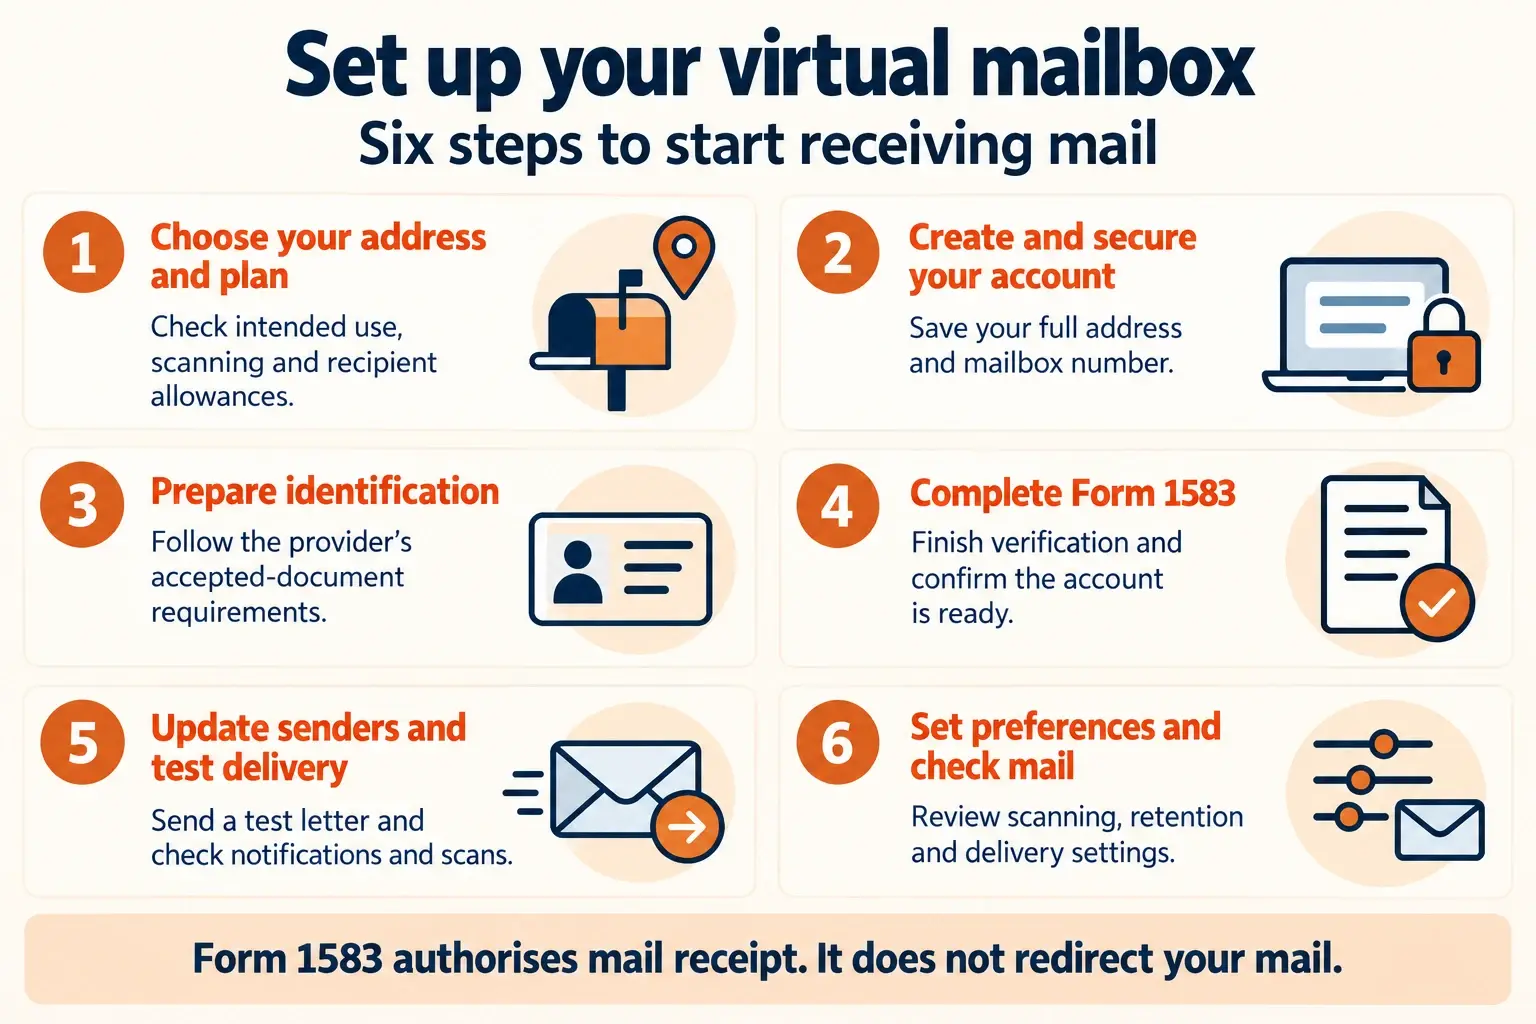
Your setup checklist
- Confirm the address suits your intended use.
- Choose the location, plan and billing arrangement.
- Create and secure the account.
- Record the exact address and mailbox number.
- Prepare acceptable identification.
- Complete Form 1583 and verification.
- Confirm the account is ready.
- Update senders and test delivery.
- Review scanning, retention and delivery preferences.
- Check mail regularly.
Once those steps are complete, you have a dependable way to receive and manage correspondence without being there to collect every letter.
Compare estimated mailbox costs, or get started with Traveling Mailbox.
For help estimating your usage, read how much mail scanning you actually need.
Preparing your documents? Read USPS Form 1583: identification, verification and common mistakes.
Planning your updates? Use our moving-abroad address change checklist to track who to notify.